Pressed Flower Art
Supplies
– Pressed flowers
– Floral scissors
– Parchment paper
– Heavy books or flower Press
– Glue
– Shadow box frame (I used an IKEA Ribba frame)
– Craft foam sheet
– Colored paper
– Pins (I used specimen pins, because I love the gold tops and matte black stems)
– Tweezers
1. Cut the flowers close to the base. Small, thinner flowers that can lay flat work best for pressing. Line a book with parchment paper and place cut flowers on the page without overlapping. Press for two to four weeks until they are completely dry.
Tip: Try to press your flowers when they are in full bloom to help get the best shape and colors. The colors will fade, but pressing them in the height of their bloom helps. Make sure they are completely dry, too, or they can mold.
2. Cut the paper and foam to frame size using the mat as a guide. Adhere foam to the back of the paper and frame.
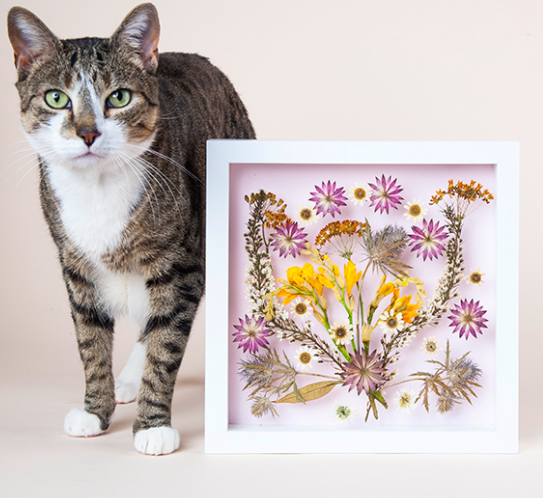
3. Compose an arrangement of pressed flowers. Once you decide on your layout, pin flowers in place starting with the bottom layer and working up. Use tweezers to easily pick up the pressed flowers.
Enjoy your new art piece!
– Pressed flowers
– Floral scissors
– Parchment paper
– Heavy books or flower Press
– Glue
– Shadow box frame (I used an IKEA Ribba frame)
– Craft foam sheet
– Colored paper
– Pins (I used specimen pins, because I love the gold tops and matte black stems)
– Tweezers
1. Cut the flowers close to the base. Small, thinner flowers that can lay flat work best for pressing. Line a book with parchment paper and place cut flowers on the page without overlapping. Press for two to four weeks until they are completely dry.
Tip: Try to press your flowers when they are in full bloom to help get the best shape and colors. The colors will fade, but pressing them in the height of their bloom helps. Make sure they are completely dry, too, or they can mold.
2. Cut the paper and foam to frame size using the mat as a guide. Adhere foam to the back of the paper and frame.
3. Compose an arrangement of pressed flowers. Once you decide on your layout, pin flowers in place starting with the bottom layer and working up. Use tweezers to easily pick up the pressed flowers.
Enjoy your new art piece!